Contents:
Having configured your environment for delivr.to emails, and optionally added an Integration or new validated email address, you’re ready to send your first campaign! 🎉
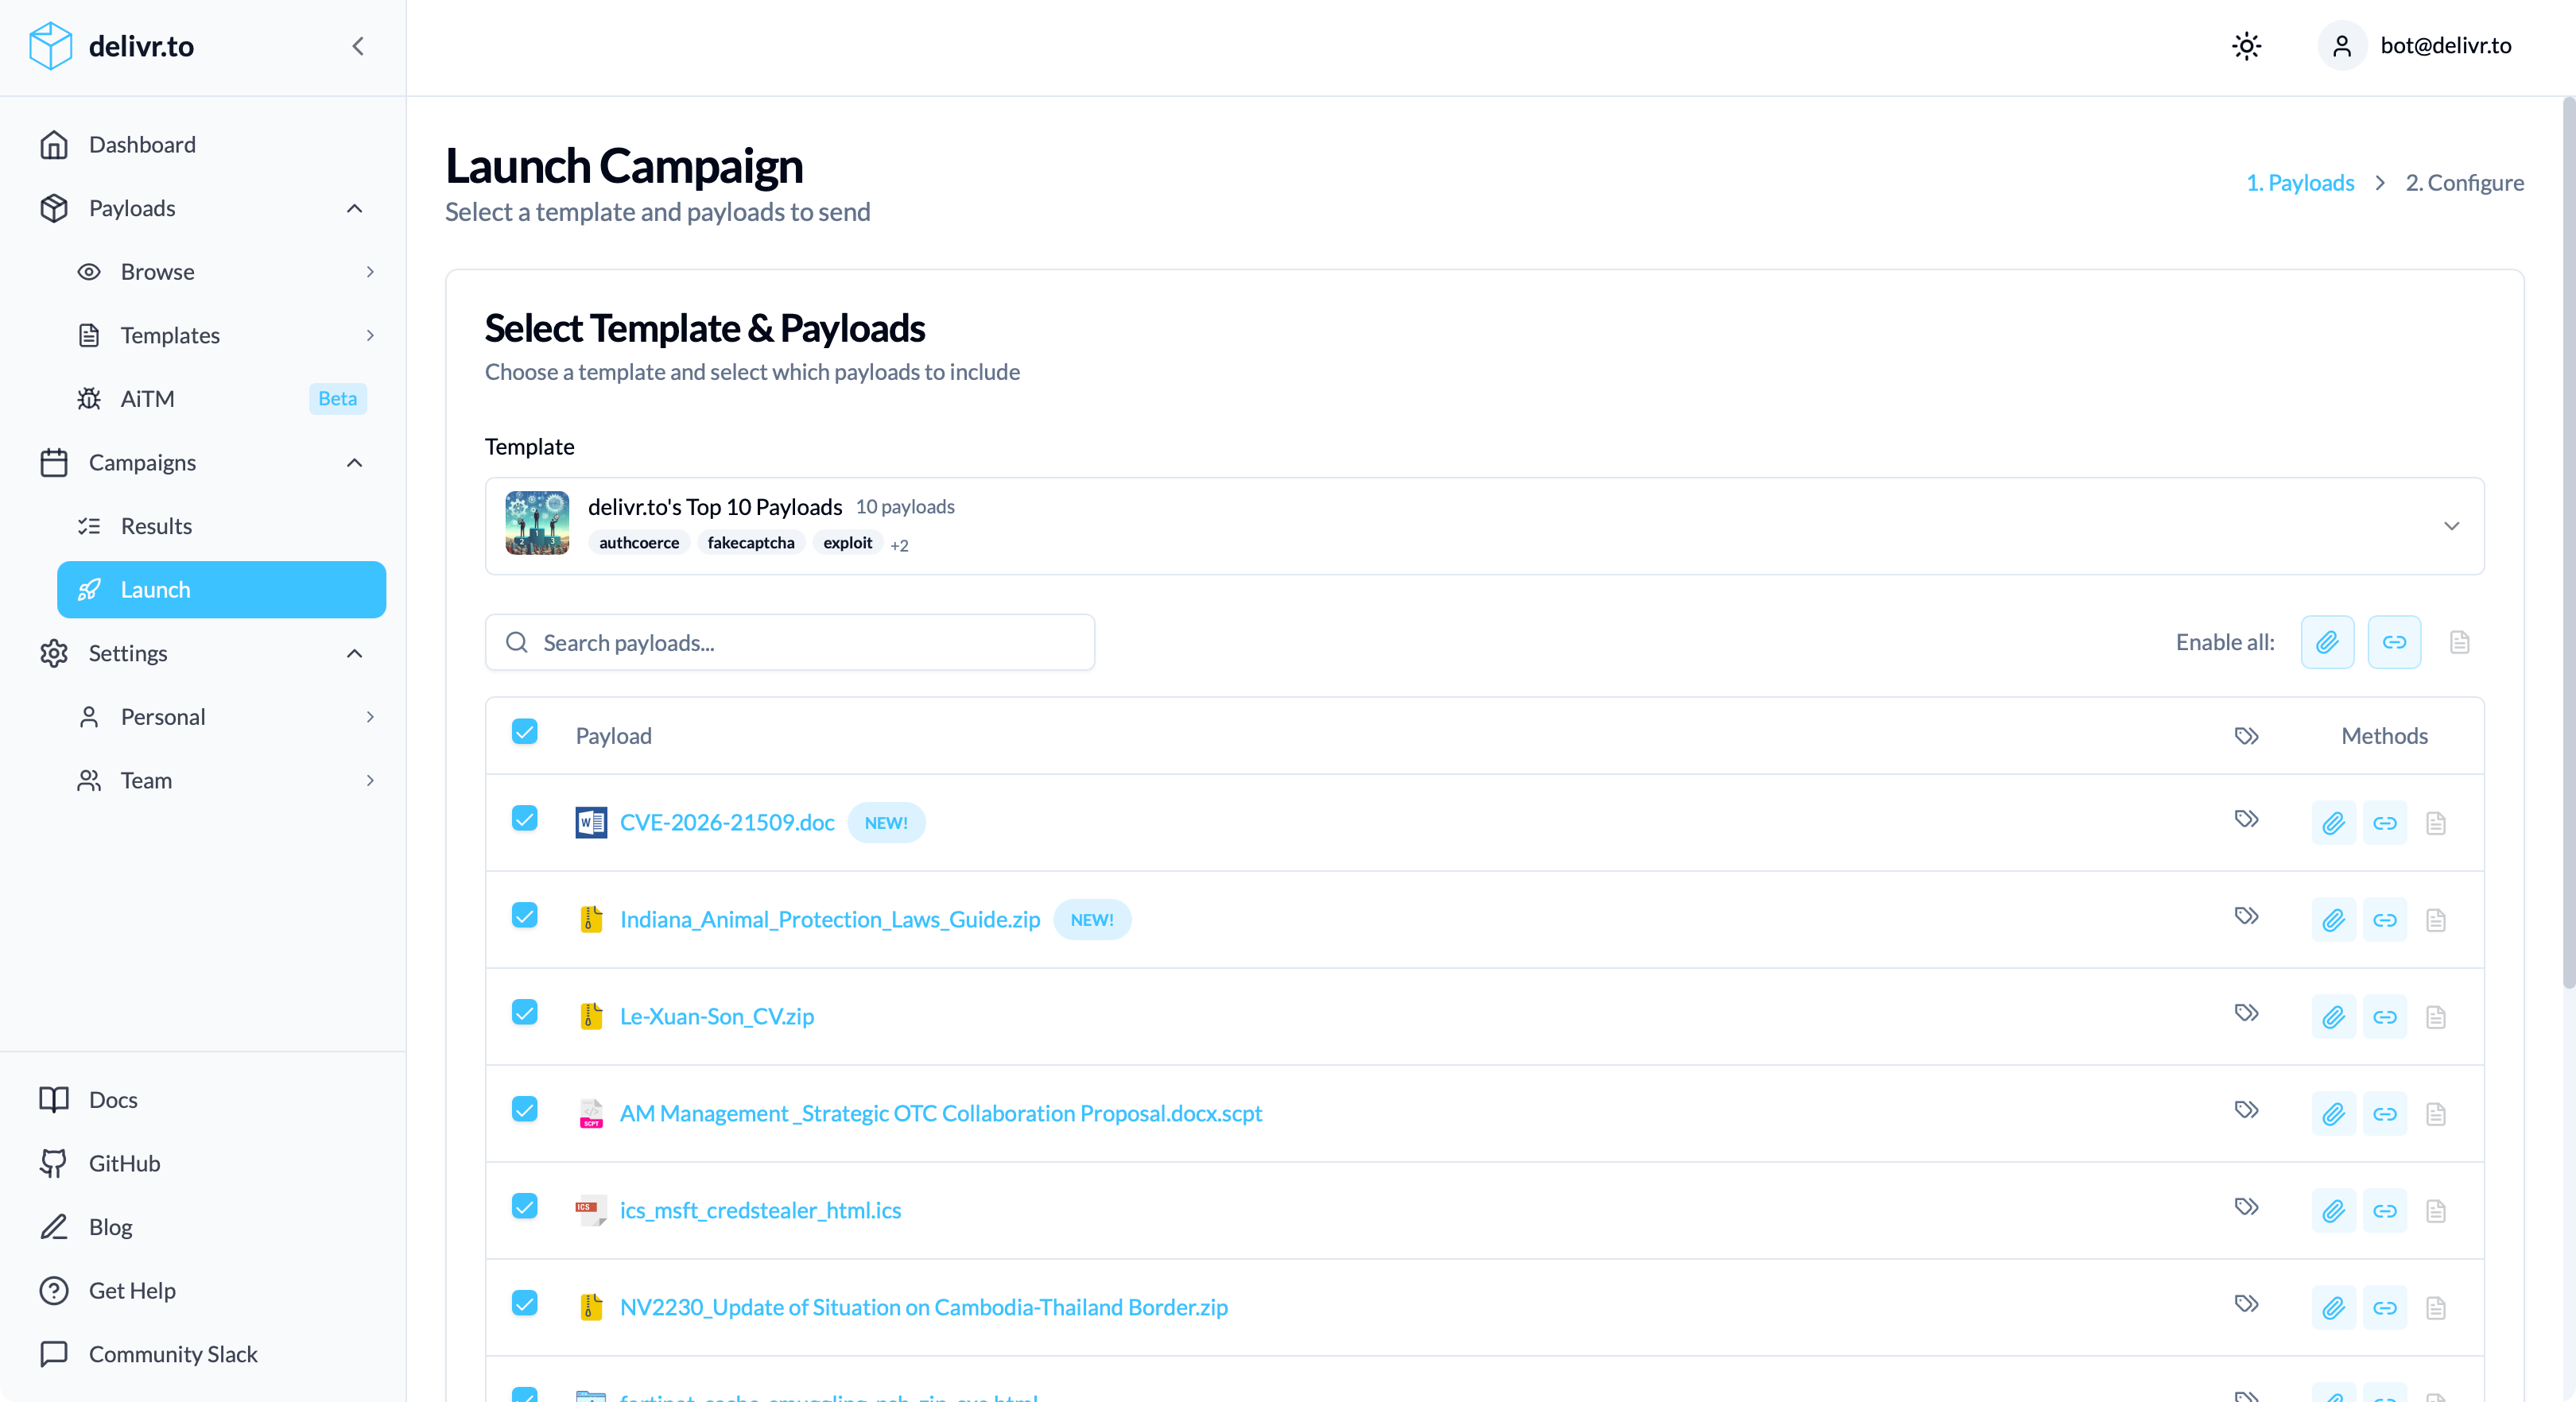
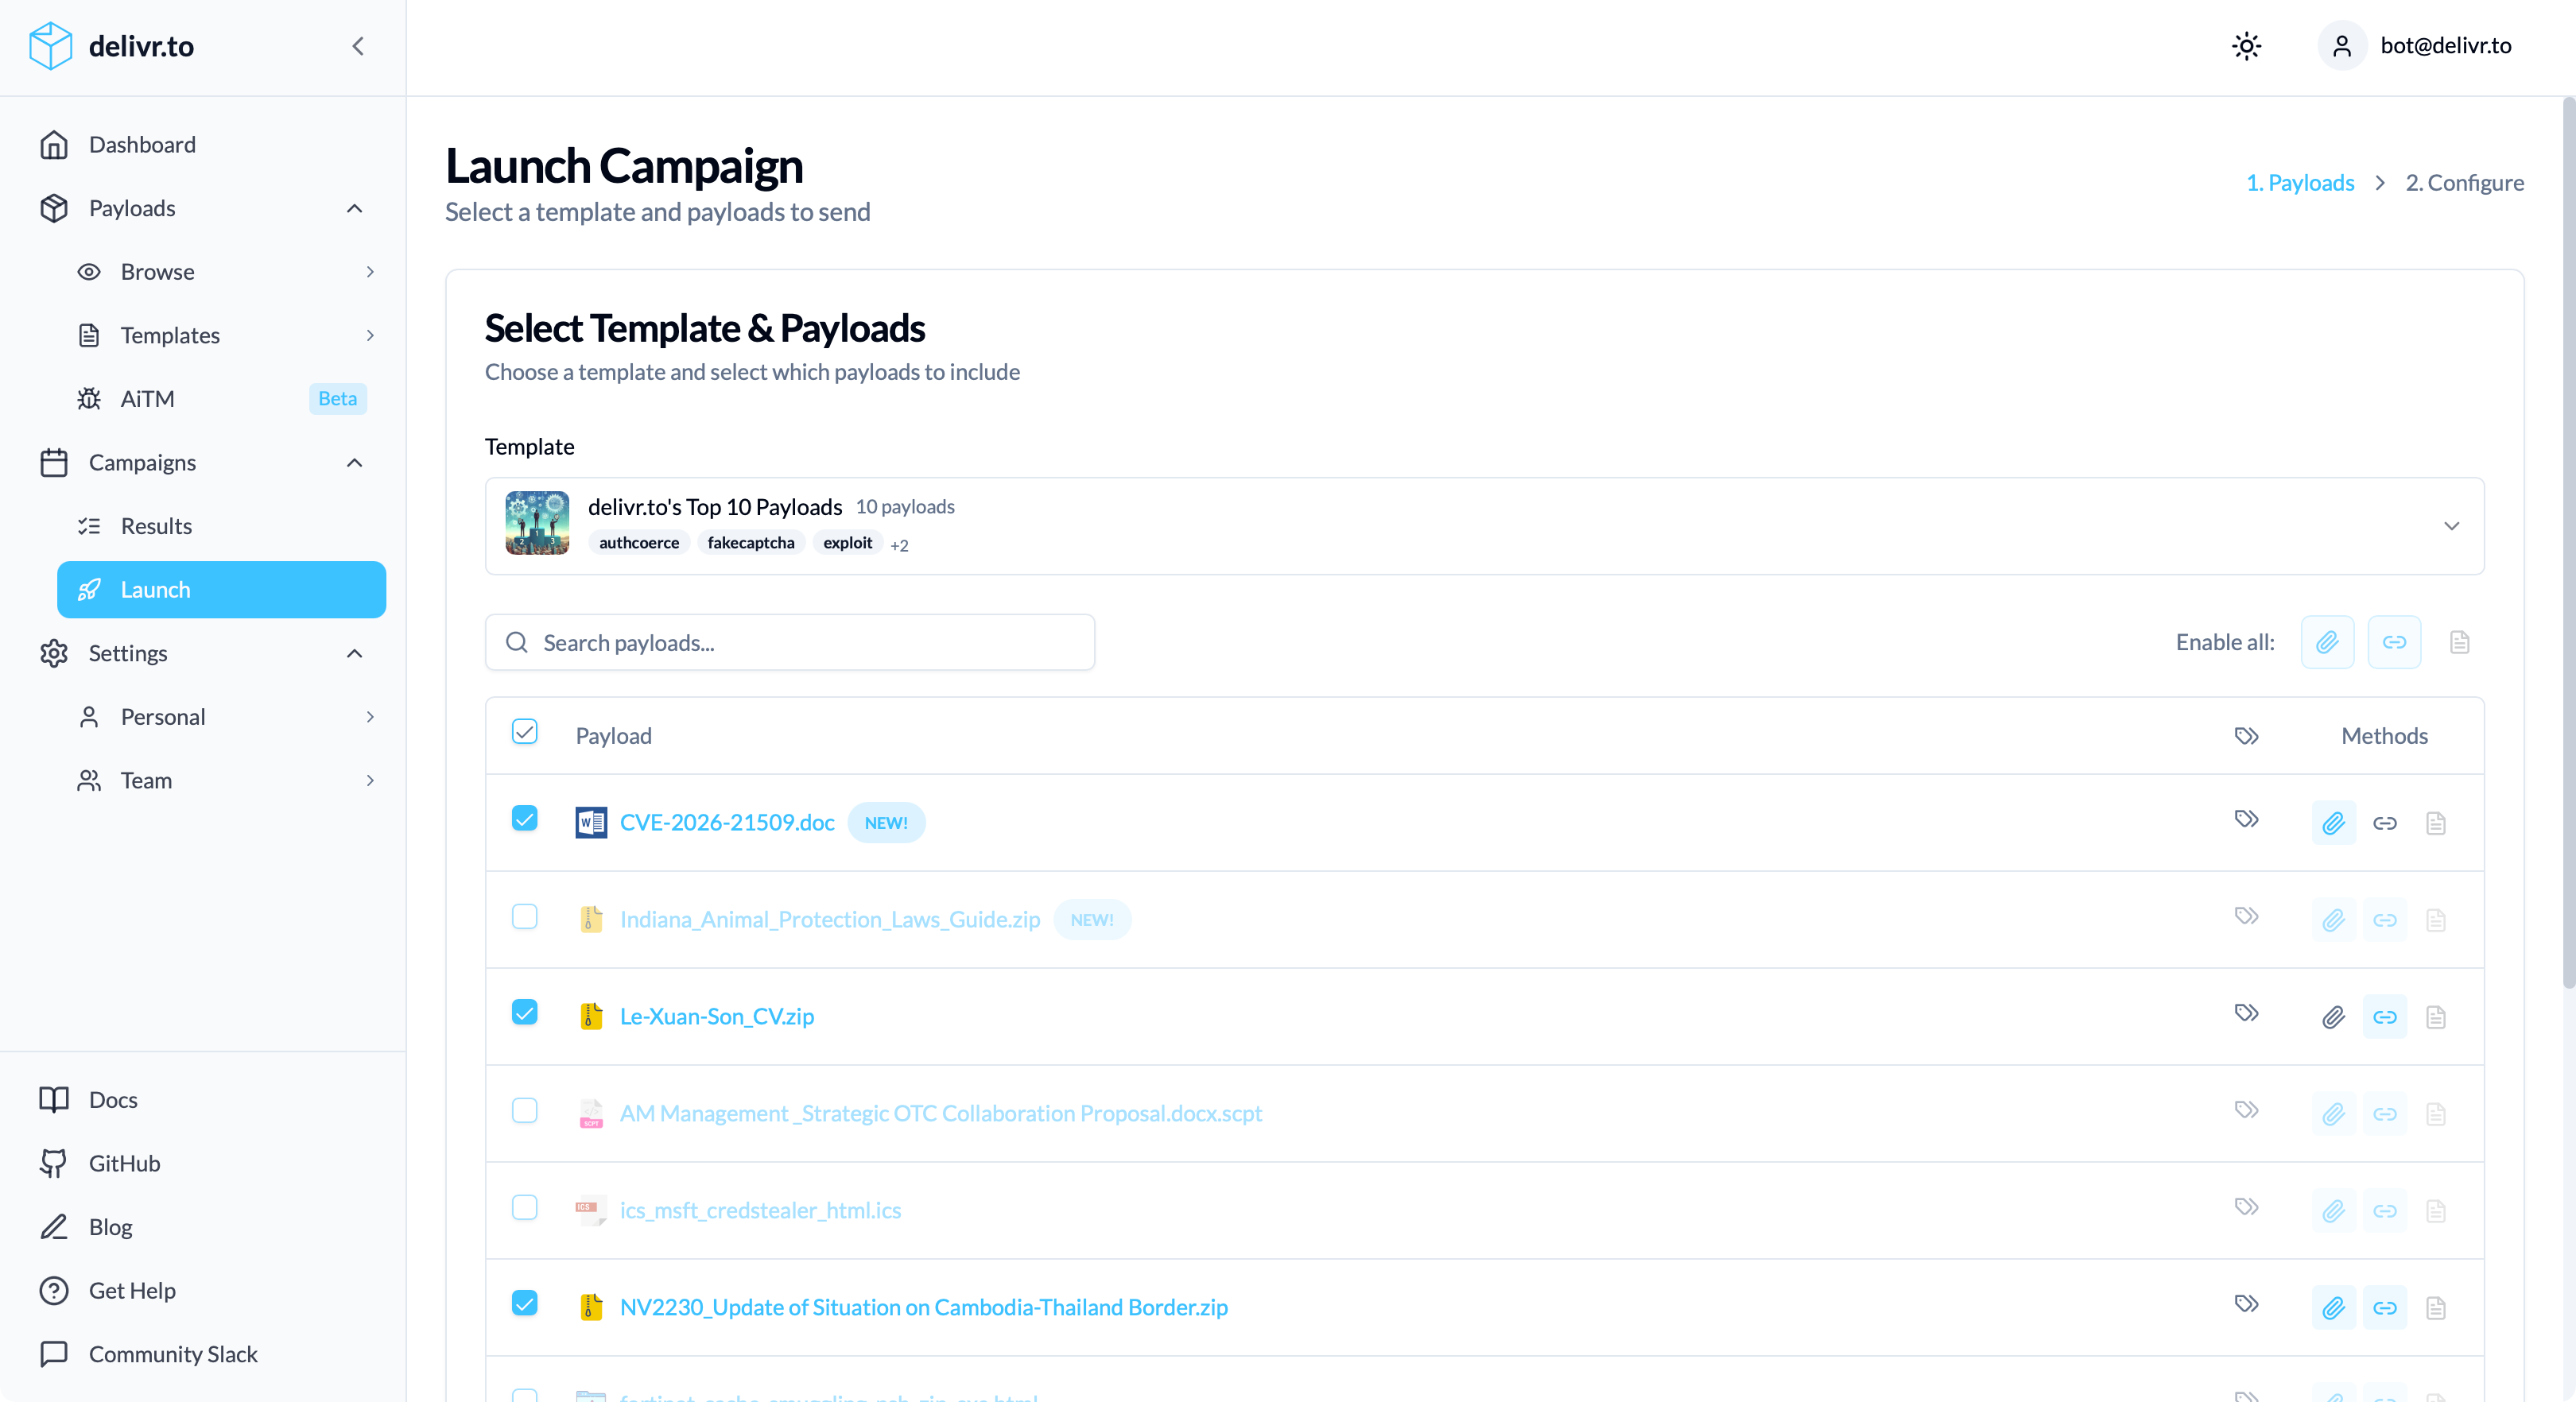
The Campaign Launch view is logically split into two sections:
- Payload Selection
- Campaign Settings
The first section, Payload Selection allows you to select exactly which payloads and delivery methods you require for your campaign, with the latter section being where you select the recipient and fine tune campaign details.
Payload Selection
In this first section, there are two primary selections to make:
| Campaign Template | What type of campaign do you want to send? Do you want to test which file types arrive in your mailbox with the File Type Testing template? Or put your Anti-Virus through its paces with EICAR Testing? |
| Delivery Methods | delivr.to can send your chosen payloads as attachments, links, or in the email body (or a combination of all of them, where supported). These settings can be applied campaign-wide or per payload, based on your preference. |
You can optionally select a subset of the campaign template payloads to fit your needs. Maybe you only want to test Word Documents in the Microsoft Office File Type Testing campaign, or only those including ISO files.
Next step, campaign customisation!
Campaign Settings
At a minimum, you’ll need to select the mailbox to target with your campaign. You can also choose to give it a memorable name for future reference.
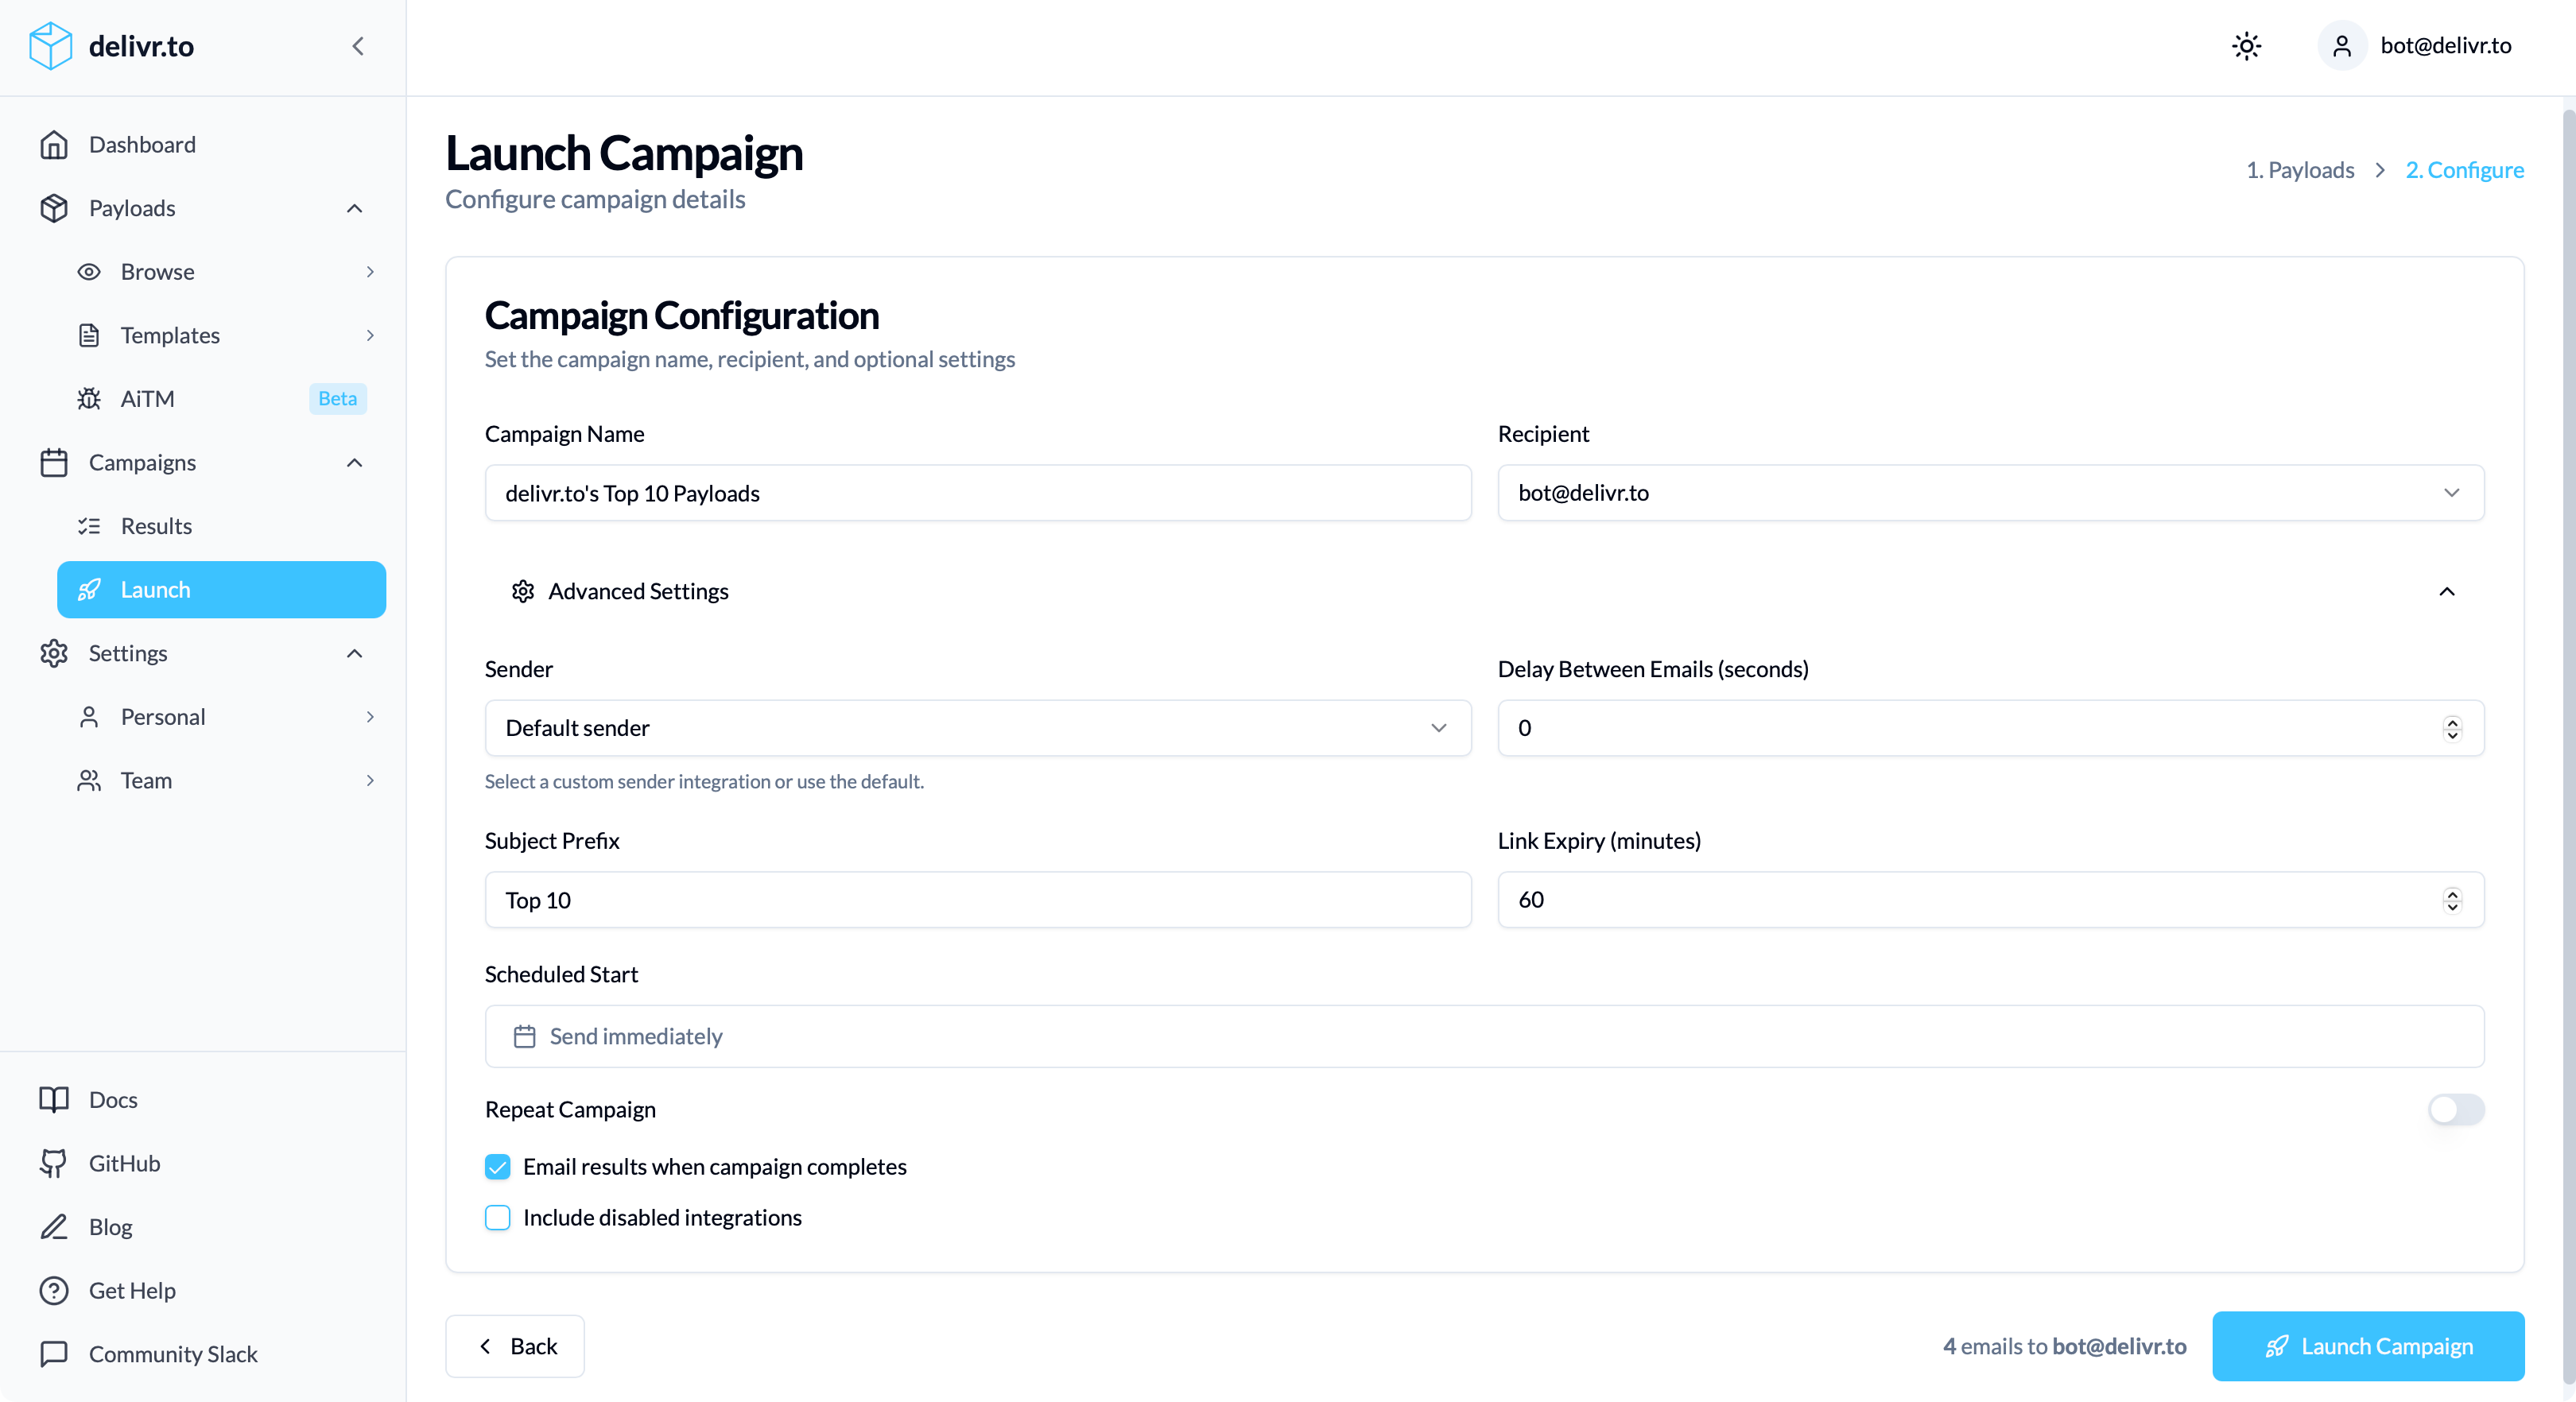
If you’re campaign needs further customisation, you can jump into Advanced Settings. This gives you options to configure:
- Custom Sender - Enterprise users can configure their own infrastructure for sending delivr.to campaigns.
- Delay between emails - If you’d prefer email delivery to be spaced out, you can configure an optional delay in seconds, rather than emails being sent as quickly as possible.
- Subject Prefix - During multi-campaign testing, it can be useful to include a memorable identifier in your email subjects to make search and filtering easier.
- Link Expiry - By default, links are sent with a 60 minute expiry, after which they’ll deactivate. Need longer? Enterprise users can configure links with up to a 24 hour expiry time.
- Scheduled Start - You might not want your campaign to send immediately, pick and choose a date and time to kick off email delivery.
- Email results - With integrations configured, your results collection can be fully-automated. Keep this checkbox ticked to receive a summary of your results without having to access the platform. Enterprise teams can configure a Reporting Mailbox to receive these emails for a shared audience.
When you’re happy, click Launch Campaign to kick things off!