Contents:
Connect SendGrid to send delivr.to emails using your own infrastructure and domains.
Prerequisites
- A SendGrid account
- A purchased domain you wish to send emails from
- Access to your domain registrar’s DNS settings
Setup Steps
1. Add Sender Authentication in SendGrid
Head to Sender Authentication in SendGrid and select Get Started under the Domain Authentication section.
Select your registrar from the dropdown and leave the branded links option as No.
Enter the domain you’ve purchased in the Domain You Send From box.
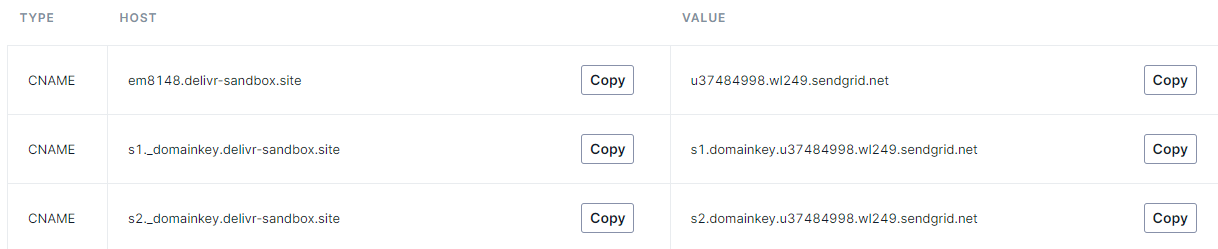
Add the provided records to the DNS section of your registrar.
Note: Some registrars (e.g. Namecheap) automatically append the hostname, so only add the host’s prefix.

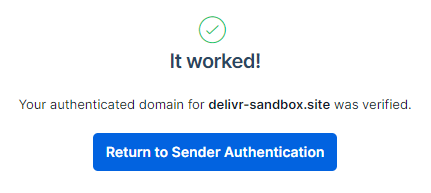
If successful, click Verify and you should see a confirmation screen.
2. Generate an API Key
Navigate to API Keys and click Create API Key.
Give it a name such as delivr.to SendGrid Integration and select Restricted Access.
| Permission | Access Level |
|---|---|
| Mail Send | Full Access |
| Mail Settings | Read Access |
Click Create & View and note the key — you won’t be able to access it again.
3. Disable Tracking
Visit Tracking Settings and disable all tracking.
![]()
4. Add the Integration in delivr.to
Go to Integrations in your settings and click Send with SendGrid.
Enter a friendly name for this integration, the API key from step 2, and the email address you’d like to send from. Since you authenticated the entire domain, you can use any address from that domain.
5. Confirm Success
Click Add. delivr.to will validate the supplied key and confirm the integration.
Troubleshooting
| Issue | Solution |
|---|---|
| Authentication fails | Verify the API key permissions match the table above and the correct key was pasted |
| Domain not verified | Confirm DNS records have propagated (this can take up to 48 hours) |
| Emails not sending | Check the “From” address uses your verified domain |
| Tracking links appearing | Ensure all tracking is disabled in SendGrid settings |